
Families and students
How do I add the test appointment to my calendar?
Written by the TestFLE team.
In short
The “Add to my calendar” button puts the test appointment in Google, Outlook or iCal. You will find it on the “My test” card on the Home page and on each line of the “Calendar”.
Who this is for, and what you need first
- Who this is for
- Families and students who want to find the day and time of the test in their usual calendar.
- What you need first
- A test announced on the “My test” card or in the “Calendar”, with an end time.
- A Google or Outlook calendar, or the device’s Calendar app.
The steps
- Open “Home” in the menu.
- On the “My test” card, click “Add to my calendar”.
- Wait for “Preparing the appointment…” to disappear.
- Click “Add to Google”, “Add to iCal” or “Add to Outlook”.
- For Google and Outlook, save the appointment in the tab that opens.
- For iCal, let the Calendar app open the downloaded file.
For another appointment, open “Calendar” in the menu. Each line has its own “Add to my calendar” button.
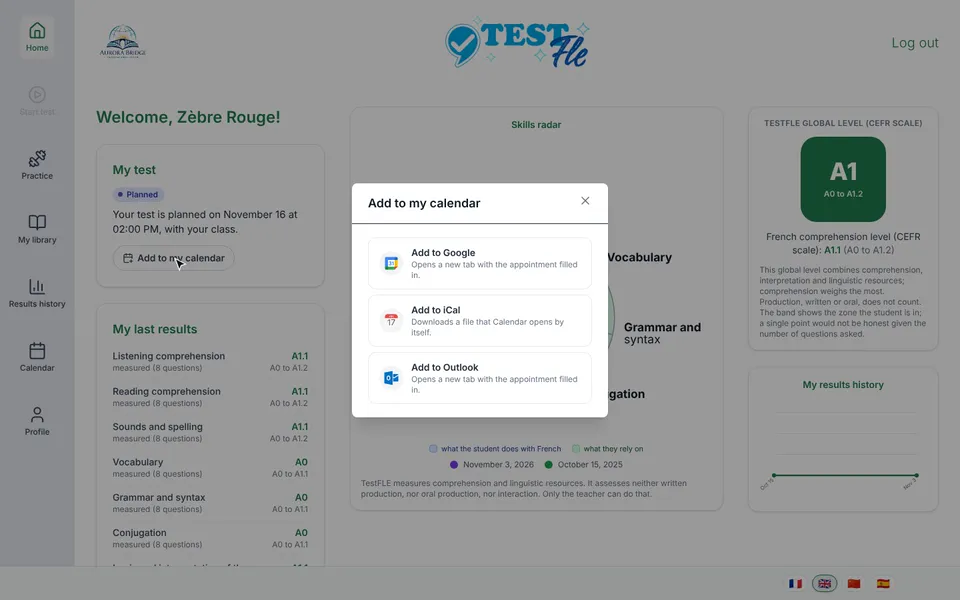
The three choices in the window
- “Add to Google” opens a new tab with the appointment already filled in. You only have to save it in that tab.
- “Add to Outlook” does the same: a new tab, the appointment already filled in, then you save it.
- “Add to iCal” downloads a file that the Calendar app opens by itself.
The appointment is called “TestFLE: French test”, followed by a hyphen and the name of the class. It starts when the test opens and ends when it closes. Its location and its description give the school’s web address on TestFLE. The text of the title follows the language of the account.
Going further
Understanding the settings and special cases
When the button appears
The button only exists for an upcoming or ongoing appointment that has an end time. So it does not appear in the following cases.
- The test is open “with no end date”, for example for Phoque Indigo, a student in CE1 Bleuets: there is no appointment to put in a calendar.
- The session is over or has been removed.
- The student is marked absent from the session.
- The session’s test has already been taken: the “My test” card then no longer offers the button (the “Calendar” keeps it until the session is over).
An example of a line with a button: Colibri Corail, a student in CE1 Bleuets, has a “once only” opening over several days. Their “Calendar” shows this line, and the button is just below it.
One appointment at a time
Each button adds a single appointment, the one on its line. There is no button that adds all the appointments at once.
If the time changes
TestFLE sends nothing to your calendar: you put the appointment there yourself, once. Nothing updates it afterwards. If the teacher moves the session, the “My test” card and the “Calendar” show the new time, but your calendar does not. In that case, add the appointment again and delete the old one.
If adding is refused
The button is hidden wherever the server would refuse. So a refusal can only happen if the situation changes between the moment the page is displayed and the click. The window then shows the message in red, in place of the three choices.
- The session has just been removed (“The session has been cancelled.”).
- The session has just ended (“The session is over.”).
- The teacher has just marked the student absent (“Absent from this session: no calendar appointment.”).
Close the window, then read the “My test” card again: it shows the up-to-date situation.
Related articles
- When can my child take the test?The teacher decides when your child takes the placement test, and the “My test” card on the Home page announces it. As long as the test is not open, the “Start test” menu entry stays greyed out.
- How long does the test last, in lightning mode or in precise mode?The teacher chooses the mode of your child’s test: lightning, with one minute per question and 35 minutes at most, or precise, with no timer. The “Start test” screen announces the mode before the test starts.